Thursday, March 25, 2010

Finding a new way to love Salmon!

When I make Salmon, I always make it the same way. I coat it with olive oil, a few seasonings and top with lemon slices. I bake it at a high temp and serve with additional lemon. I feel most of my blogs have been about my own recipes, so I decided to try a few new options. They were great!!!First I prepared the marinade for Soy Ginger Salmon. It contains soy sauce, olive oil, lemon pepper, garlic (I used fresh), ginger, brown sugar and orange juice. I did not rub my salmon as the recipe states...I just threw it all in the marinade :) Combine and pour over salmon. Place in the refrigerator until it is time to cook...at least 2 hours.

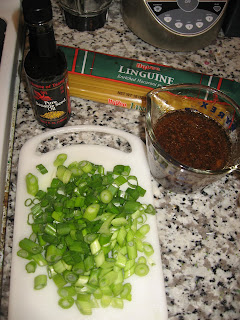
Then I prepared the sauce for the Sesame Noodles. It combines soy sauce, rice wine vinegar, chili sauce, oil (I used vegetable), garlic, white sugar, green onions and sesame oil (I used half the sugar and half the oil the recipe called for).


I do not add the sesame oil to the sauce to cook, but rather at the end after tossing the cooked linguine with the sauce. I think the flavor is stronger than if you cook it!
I also chopped up one bunch of broccoli with 4 cloves of sliced garlic, 1 tsp of red pepper flakes, a little kosher salt and 2 TBS of olive oil to roast in the oven.

I roasted the broccoli and salmon at 450 degrees for about 20 minutes. The broccoli gets crispy on the edges and the salmon was cooked through, but very moist!
As the linguine was cooking, I added the noodle sauce to a skillet to heat through. I tossed with the cooked pasta and the 2 TBS of sesame oil.
The completed meal was amazing! The salmon was a great change for us...very moist! The broccoli is always a favorite and the cold leftovers of the sesame noodles might be even tastier than they were while warm with dinner!! A successful combination :)

Tuesday, March 23, 2010

Admitting my love for Fried Green Olives!

Years ago, my parents traveled to California to visit wine country. They stopped one afternoon at a roadside bar, and ordered a few appetizers. My dad came home raving about the stuffed and fried olives they had, and he set out to perfect the recipe. They quickly became a family favorite. I don't eat a lot of fried food, but I would have to say...these are my absolute favorite "junk food". This is my version of Dad's Bar Olives!!


It all begins with a jar of Queen size Green Olives. 21 oz...which for me, translates to 60 olives.


Drain olives and remove the pimentos (reserve in a dish). If you are lucky enough to find Queen size olives un-stuffed...go for it. I however, am not willing to pay $7 for 20 un-stuffed olives. So I buy the jumbo jars at Sam's Club and remove the pimentos. If you use a sharp knife, you can pull them out easily. 60 olives took me less than 5 minutes.

Keep the olives on a paper towel to remove the moisture. Save the pimentos for use in Pimento Cheese Spread!!


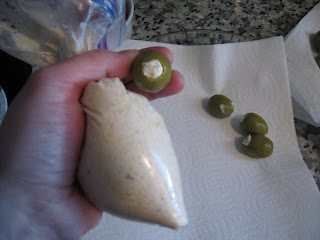
Mix together 4 oz of cream cheese (I use low-fat) with 1 cup of finely grated pepperjack cheese, and 1 tsp of tabasco sauce. Put into a doubled up sandwich size ziploc bag (I one bag inside another for a little added strength, could also be done with a pastry bag).

Snip the corner of the bags and pipe into each olive until it is filled to the surface. Do not overfill or they will explode when frying.

After all the olives are filled- place the plate of olives in the freezer for 30 minutes.

Crack two eggs and mix with 1 TBS of water. Beat until combined. In a second bowl, mix 1 cup of bread crumbs with 2 TSB of flour, and 1 tsp of black pepper. Dunk each olive into the egg and then the bread crumb mixture and place on a clean paper towel lined dish. (I put about 4 olives in the egg and then crumb mix at a time, using one hand for wet and one for dry...this takes about 12 minutes)

After they have one coat, place in the freezer for another 30 minutes. Refrigerate the egg mixture.

Coat olives a second time and return to the freezer. (You may need to add a little more of the bread crumbs). Once the coating is set, you can transfer them to a large ziploc bag and store in the freezer.

When ready to eat, heat your frying oil of choice and add about 6 olives at a time. (I use a sauce pan with about 1 cup of vegetable oil over medium high heat). If you have a deep fryer, you could fry more than 6 at a time.

Place on a paper towel to drain and cool for a few moments before consuming.


Yummy oozing olives!!! This recipe is also wonderful with blue cheese instead of pepper jack :)

Thursday, March 18, 2010

I love Everything Bagels!

Every year, my family comes to my house for Easter. I make a big brunch on Easter morning and one of our favorite items, is smoked salmon with cream cheese on bagels. My brother actually smoked the salmon for us the last two years, so I thought this year, I would make the bagels from scratch too! This was my first attempt at bagels and I used the Bread Machine Bagel recipe, but did it all by hand. First- I proofed the yeast in warm water and sugar.


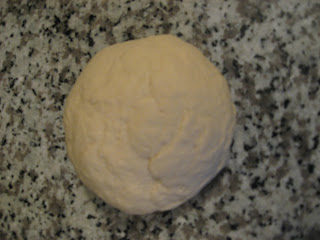
Once foamy, I added in the bread flour and salt. I kneaded the dough until it formed a firm ball and then placed in a bowl to rise.


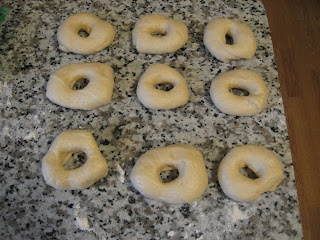
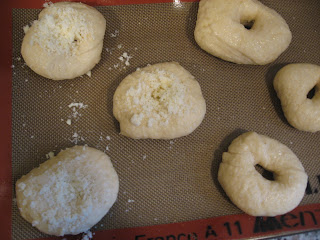
Once my dough was ready, I made 9 small balls, stuck my finger in the center of each, and gently twirled until I had a decent hole in the middle. After reading several reviews, I used this method instead of making a rope, because several reviewers said it came apart in the water bath.


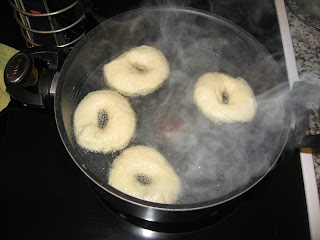
After forming my bagels (kinda rough looking!!), I let them rest for about 20 minutes. Then I prepared my water bath. I chose to use baking soda instead of sugar based on other reviews. However, I think I may try a combo of baking soda and sugar next time.


I boiled my bagels for about 2 minutes, placed on a dish towel to remove some of the water and then transferred to sil-pat lined baking sheets.


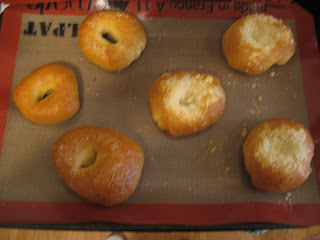
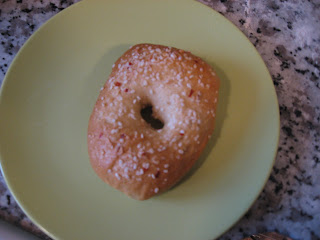
I wanted to try a bunch of different flavor combos, because this was my experimental batch. I made one plain, 2 Salt, 3 Asiago Cheese, and 3 Everything (minus poppy seeds, which I didn't have). I used sesame seeds, dried garlic, red pepper flakes and salt in my "Everything" mix.
I brushed the bagels with beaten egg whites and then topped.


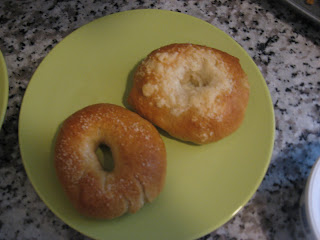
I baked them at 375 for 25 minutes. They turned out ok...but the flavor and texture weren't quite what I wanted. They were a little too soft for me, and I think I used too much baking soda in my water bath...oops!


My husband and daughter both gobbled them up. I will try again for sure!! Maybe the Boiled Bagel recipe next time!!


My favorite- The Everything Bagel!

Sunday, March 14, 2010

I love a good Burger and Fries!

Some days- I love to cook so much, I just can't stop!! Today was one of those days- so I have to include two recipes this time. First, I made Honey Wheat Sandwich Rolls to serve as our hamburger buns for dinner. 60 degrees, sunshine and melted snow mean it's time to bust out the grill!!!
For these rolls- you will need:

Bread Flour
Wheat Flour
Dry Active Yeast
Vital Wheat Gluten ( I added this)
Salt

Honey
Milk
1 Egg
Butter
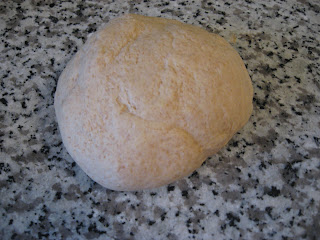
Heat 1 cup of milk and 2 TBS butter for 1 minute in the microwave (I add the additional 1/4 cup of milk after to bring the temp down a bit). Add to it 1 1/4 tsp of dry active yeast and 1/4 cup of honey. Let stand for 10 minutes until foamy. Add in 1 cup of Wheat Flour, 2 cups of Bread Flour, the salt, 1 tsp of vital wheat gluten and 1 egg, beaten. Knead for 10 minutes adding up to 3/4 cup additional bread flour, as needed. When dough is smooth- it will look like this:


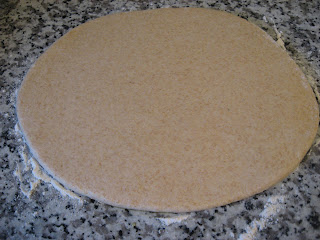
Allow to rise for about 45 minutes and then roll out and form into balls or cut with a biscuit cutter. This dough is so soft and wonderful to work with!!

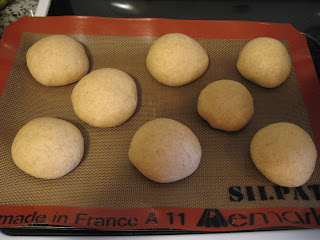
The recipe makes 16 dinner rolls- I made 8 Hamburger buns instead.


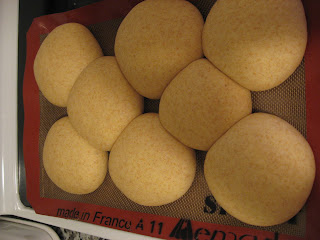
Cover buns and allow to rise for 1 hour- until doubled in size. They will look like this:


Bake at 350 degrees for 10-15 minutes and brush with melted butter when you pull them from the oven. The result is soft and gorgeous buns!


I made the buns in the morning- less to do at dinner time.

This is my Oven Fry Recipe...French Fries without the Fry.
About 1 hour before you wish to eat, preheat oven to 450 degrees and place a foil lined baking sheet on the bottom rack.
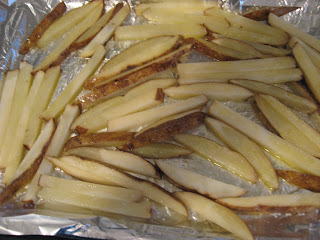
Wash one large russet potato per person and slice into 4 planks. Slice each plank into four sticks and place on a microwave safe plate.


Microwave for four minutes and toss onto the hot baking sheet (Microwaving the potatoes dries them out so they crisp better). Spray the fries with a little cooking spray and about 2 TBS of olive oil. Sprinkle with salt and toss to coat. Put on bottom rack of the oven.


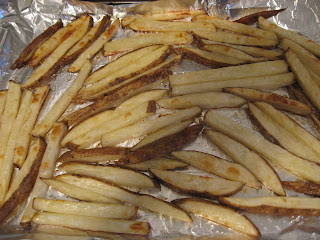
After about 20 minutes- remove the baking sheet and toss the fries. They will look like this :


Place back on the lower rack for an additional 10-15 minutes until golden brown.


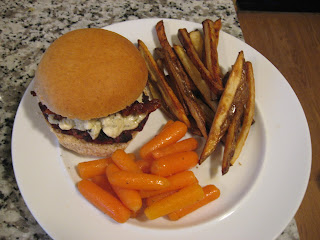
Serve with a freshly grilled burger, placed on the beautiful wheat bun! Delicious :)

Monday, March 8, 2010

Truffle Fudge Cheesecake...because I love chocolate!

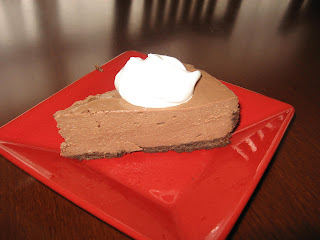
Have you ever had a bite of chocolate and thought..."I've died and gone to heaven?" My hubby and I are both in agreement that this gives you that "Ahhhhh" moment with your first bite. Truffle Fudge Cheesecake- the name alone got my attention. I made this for dessert last weekend for my great friend Jamie and her hubby!

First- begin by creaming two 8 oz packages of room temperature cream cheese, with four room temperature eggs. Slowly add in vanilla and sweetened condensed milk. Cream until the mixture is smooth. I chose to use chocolate graham crackers instead of vanilla wafers in the crust, for an extra chocolate punch!! I used two and half sleeves of graham crackers. Put in a ziploc bag and crush using a rolling pin. (I roll over the bag a few times for fine crumbs)
I added 1 stick, plus 4 TBS melted butter, and 2 TBS of cocoa powder to my graham crackers. I mix the whole crust in the bag- why dirty another bowl?? When properly mixed, it should look like this: Using a glass, press the graham cracker crust into your spring form mold. The glass helps you to get the crumbs tightly pressed to the sides and an even layer on the bottom.
Melt 1 bag of semisweet chocolate chips or chunks and stir into the cream cheese mixture.
Slowly pour the mixture into the crust, smooth the top and tap the side of the pan to release any air bubbles. Bake at 300 degrees for 55 minutes.
Turn off the oven, crack the door, and allow the cheesecake to cool in the oven. Mine didn't crack!!!! Refrigerate until serving. If desired, serve with a dollop of whipped cream. Decadent and delicious!

It's fun feeding my husband the food he loves!

Sometimes the simple things can be the most delicious! My husband says that my Stuffed Green Peppers are at the top of the list of his favorite things I make...I love it when little work leads to great reward! The main dish of this recipe requires 6 ingredients, and the side dish requires about 3. The prep time is approx 10 minutes, which means a great meal with little time spent in the kitchen. As much as I love to cook, sometimes you need an easy go-to option.
This serves 2 adults.

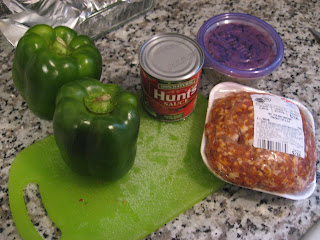
For the peppers you will need:

2 Large Green Peppers
1/2 lb Hot Italian Sausage
A small can of Tomato Sauce (I like the basil and garlic flavor)
1 cup of cooked Rice (I use Wild Rice)
1/2 cup of Mozzarella Cheese
1/4 cup of Fresh Grated Parmesan


For the side you need 1 cup of baby carrots, 1 cup of radishes (quartered), a drizzle of olive oil and whatever spices you like to season with (I like lemon pepper and garlic salt). Throw the clean veggies on a baking sheet. Drizzle with oil and season. Set aside. Pre-heat your oven to 400 degrees.


I like to stuff my peppers whole and I want them to stand up pretty, so I cut the knobs off the bottom to make a flat surface. Should look like this:


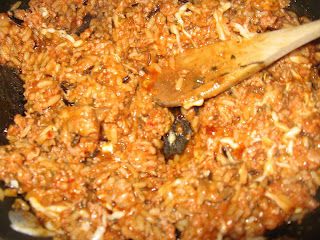
Next I brown 1/2 lb of Hot Italian Sausage. Once it is cooked through, I add in my cooked rice, 3/4's of the can of tomato sauce and the grated Parmesan. Heat until the whole mixture is warm. It should look like this:


Next- stuff the peppers with the hot mixture until it comes just over the top of the pepper.


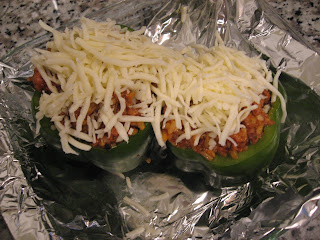
Top your peppers with the shredded mozzarella (Fresh mozzarella slices are even better, but I went with what I had on hand). Put the peppers on the top oven rack and the radish/carrot combo on the bottom rack. Cook for 15-20 minutes until the cheese on the peppers has started to brown, and the veggies are tender.


***Side note...if you have never had roasted radishes, you MUST try them. I don't care for them raw, but I love them roasted with carrots. They compliment each other well!***

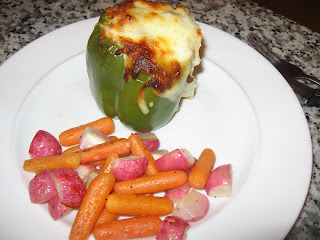
Serve up your pepper with a generous side of roasted veggies!


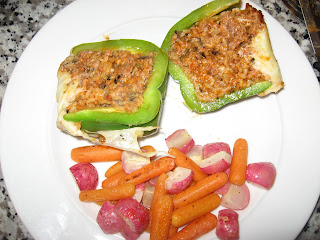
The inside is cheesy and delicious. This meal is eaten quickly at my house...with a few happy sighs from my hubby :) Enjoy!